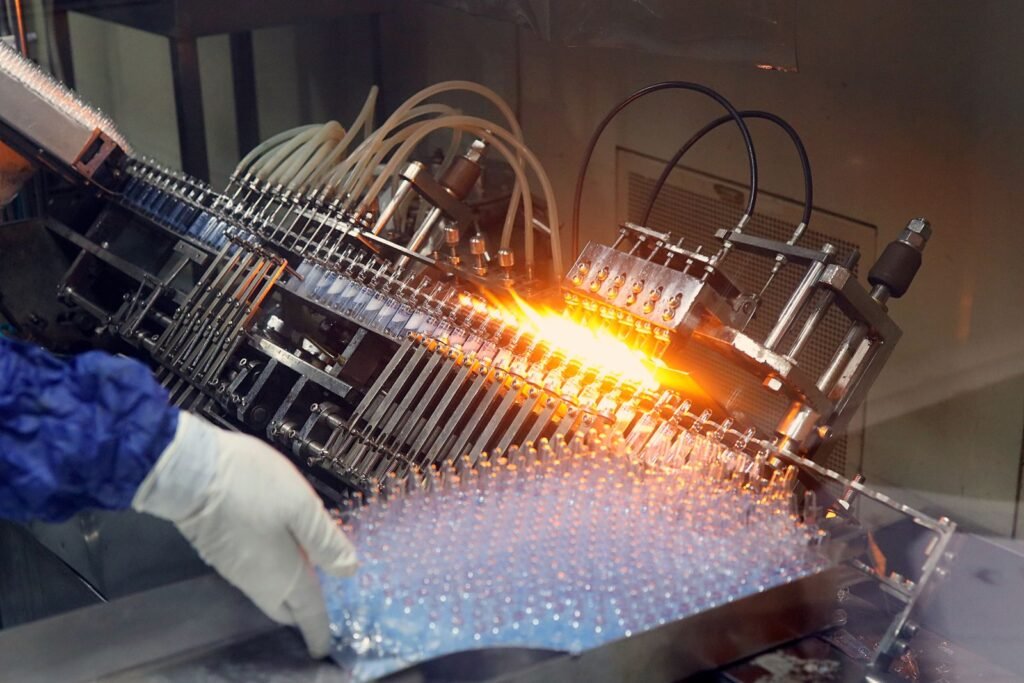
Quick Answer: Tablet defects are physical, mechanical, or quality-attribute deviations that occur during tablet manufacturing—most often during powder feeding, compression, and ejection. Common types include capping, lamination, sticking, picking, chipping, cracking, binding, double impression, weight variation, and hardness or friability failures. These issues rarely have a single cause; they typically arise from the interaction between formulation properties, punch and die condition, press operating parameters, and room environment. Effective troubleshooting starts with identifying the exact defect, documenting batch conditions, and systematically evaluating material, tooling, and machine factors under approved procedures.
Key Takeaways
- Compression defects are multi-factorial: Formulation behavior, punch and die condition, press setup, and ambient humidity or temperature interact during every compression cycle.
- Not all defects are visual: Tablet weight variation, low breaking force, and high friability are quality-control failures that require instrument testing rather than visual inspection alone.
- Equipment cannot fix every formulation issue: Pre-compression, forced feeding, and stable turret control support consistency, but poor blend flowability or excessive elastic recovery must still be addressed at the formulation level.
- Systematic diagnosis prevents repeat failures: Checking tooling wear, feed uniformity, and logged process parameters before changing validated settings helps isolate root causes safely.
What Are Tablet Defects?
In pharmaceutical and nutraceutical manufacturing, tablet defects refer to structural flaws, surface imperfections, processing disruptions, or out-of-specification physical attributes that compromise a tablet’s appearance, mechanical integrity, downstream processability, or dosing consistency. Even minor defects can lead to rejected batches, coating failures, packaging jams, or regulatory compliance risks.
To troubleshoot tablet manufacturing defects efficiently, production teams should separate them by where and how they originate:
- Compression-related defects: Structural failures driven by air entrapment, elastic recovery, or uneven stress distribution during compaction and ejection—such as capping, lamination, and cracking.
- Formulation-related problems: Issues rooted in powder flowability, particle size distribution, moisture content, binder effectiveness, or lubrication balance that cause sticking, picking, or weight drift.
- Tooling-related problems: Surface defects, edge chipping, binding, or double impressions caused by worn punch tips, damaged die bores, rough punch faces, or improper tooling alignment.
- Quality variations: Measurable deviations in tablet weight, thickness, breaking force (hardness), friability, or disintegration that may not be obvious to the naked eye.
- Coating-related defects: Downstream film or sugar coating flaws—such as orange peel, logo bridging, twinning, or color mottling—that occur in the coating pan rather than the tablet press.
This guide focuses specifically on tablet compression defects occurring during the tableting stage. If your tablets pass compression inspection but show surface roughness, peeling, or uneven color after coating, refer to GRAND Machinery’s dedicated tablet coating defects troubleshooting guide for spray-gun, airflow, and pan diagnostics.
How Tablet Compression Works
Understanding tablet compression troubleshooting requires looking at the sequence of mechanical events inside a tablet press. While exact mechanisms vary between single-punch and rotary platforms, a standard rotary compression cycle follows seven stages:
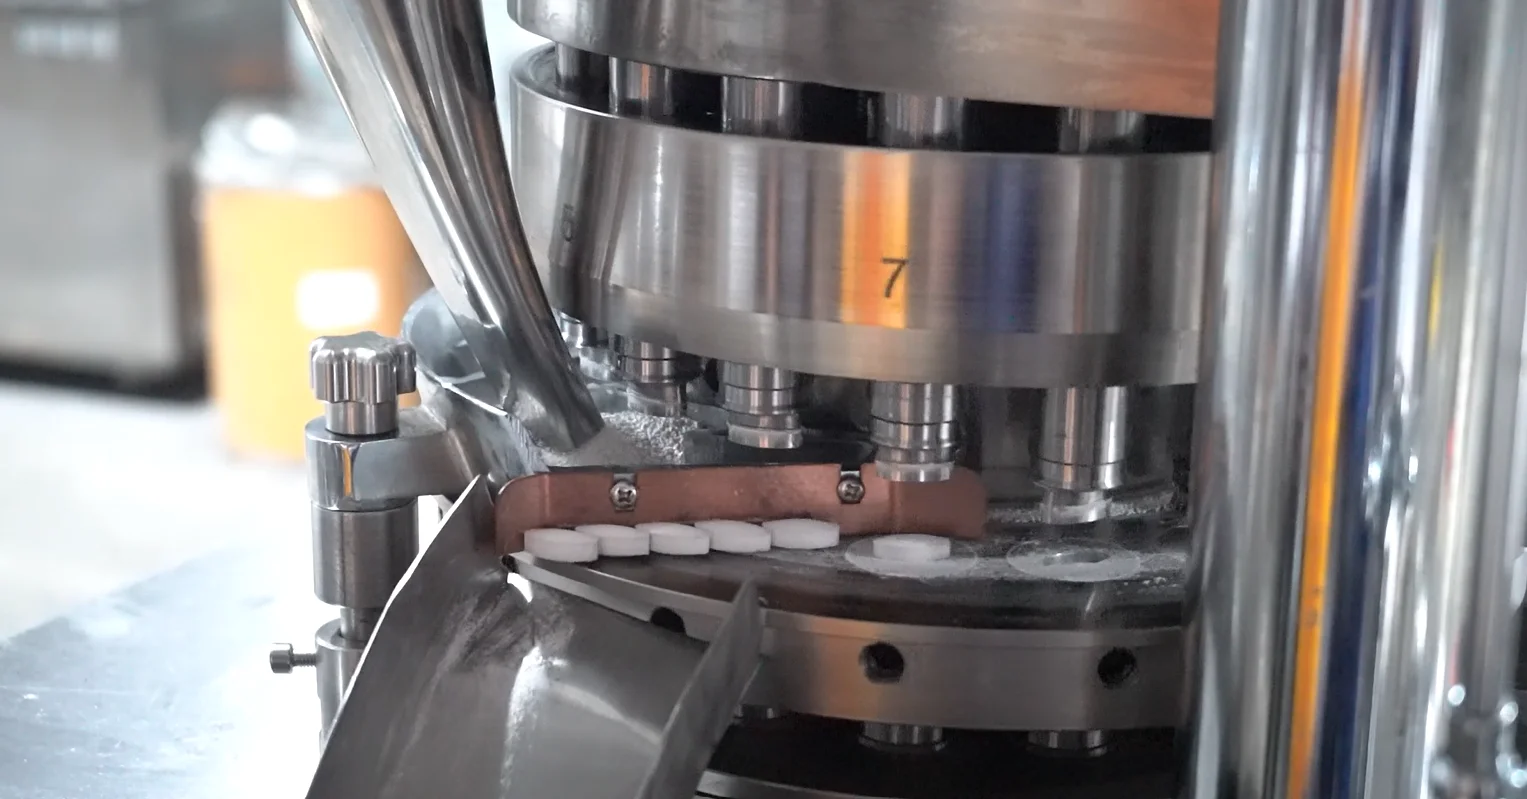
- Powder or granule feeding: The blended formulation flows from the hopper into the feed frame—either by gravity or with the assistance of a mechanical forced feeder—to keep a consistent supply of material above the die table.
- Die filling: As each die passes beneath the feed frame, the lower punch drops along the pull-down cam, creating a cavity that fills with powder or granules.
- Metering (weight control): The lower punch rises to a set dosing position, and a scraper blade levels the die surface so a controlled volume of material remains inside the die bore.
- Pre-compression (where fitted): Before main compaction, the upper and lower punches pass through pre-compression rollers at a lower load. This stage helps consolidate the powder bed and expel trapped air.
- Main compression: The punches pass between the main compression rollers, applying the primary compaction force that bonds the particles into a solid tablet.
- Tablet ejection: The upper punch retracts while the lower punch rides up the ejection cam, pushing the finished tablet flush with the die table so the take-off blade guides it into the discharge chute.
- Subsequent inspection and handling: Ejected tablets pass through dedusting, metal detection (where installed), in-process quality checks, and collection containers before coating or packaging.
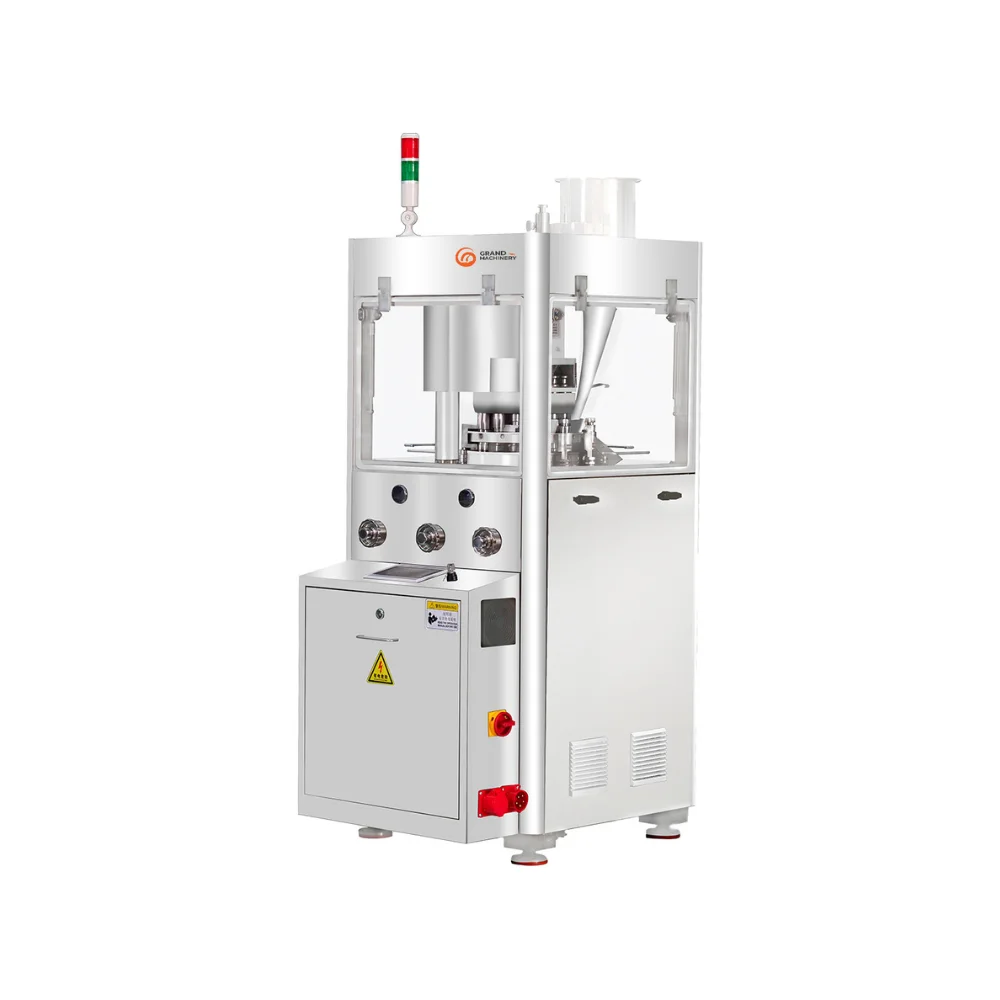
Not every tablet press shares the same configuration. Entry-level single-punch presses compress from the upper punch without a pre-compression stage, whereas industrial rotary presses vary in station count, feeding design, and control instrumentation. For example, GRAND Machinery’s ZP200 Rotary Tablet Press is configured with a built-in pre-compression stage (up to 20 kN), main compression up to 80 kN, variable-frequency turret speed control (up to 40 rpm), a PLC touchscreen with pressure-overload shutdown protection, and an optional forced feeding device. While features like pre-compression and forced feeding help stabilize die fill and air release, no tablet press can compensate for a fundamentally uncompressible, poorly lubricated, or severely segregating formulation.
Common Types of Tablet Defects
Production engineers and quality managers should distinguish between visual appearance defects (visible on the tablet surface or edges), process-related defects (friction or adhesion events inside the press), and quality test indicators (measured in the lab or during in-process checks). Below are the ten most common defects in tablets.
1. Capping
- What it looks like: Complete or partial horizontal separation of the top or bottom crown (“cap”) of a tablet from its main body.
- When it occurs: During ejection from the die, immediately after compression, or later during friability testing, dedusting, or coating.
- Possible causes: Entrapped air in the powder bed, high elastic recovery of the formulation after unloading, excessive main compression force, overly high turret speed (short dwell time), excessive fines, very dry granules, or worn die bores and punch tip edges (J-hooks), as detailed in Natoli Engineering’s guide to preventing tablet capping.
- What to investigate: Check pre-compression force, main compression force, turret speed, punch penetration depth, die bore wear rings, and granule moisture or fines content.
- How to prevent or reduce: Evaluate de-aeration through appropriate pre-compression, verify punch penetration and dwell time, inspect dies for wear or consider tapered dies where appropriate, and review binder and moisture balance during formulation development.
2. Lamination
- What it looks like: Separation of a tablet into two or more distinct horizontal layers rather than just the top or bottom crown.
- When it occurs: During compression unloading, ejection, or mechanical handling and friability testing.
- Possible causes: Similar mechanisms to capping—trapped air, rapid decompression of elastic materials, excessive compression speed, over-lubrication that weakens interparticle bonding, or deep die-wall wear creating radial expansion stress during ejection.
- What to investigate: Review turret speed, pre-compression setup, lubricant type and blending time, granule compressibility, and die bore geometry.
- How to prevent or reduce: Address air removal and dwell time, avoid over-blending hydrophobic lubricants, and confirm that die bores are within tolerance.
3. Sticking
- What it looks like: Tablet material adheres to the punch face or die wall, leaving a dull, rough, or pitted tablet surface and visible film buildup on the punch tip.
- When it occurs: Progressively during a compression run, often worsening as turret temperature rises or humidity fluctuates.
- Possible causes: High formulation moisture, low-melting-point active ingredients or excipients, insufficient lubrication, rough or worn punch tip surfaces, low compaction force (where cohesive strength inside the tablet is weaker than adhesion to the metal), or elevated room humidity creating capillary bridges, as noted in I Holland’s technical review of sticking.
- What to investigate: Inspect punch tip surface finish, verify room temperature and relative humidity, check granule moisture, and review lubrication and compression force.
- How to prevent or reduce: Maintain controlled compression-room climate, keep punch faces properly cleaned and polished, review tablet cup geometry and steel/coating selection, and verify formulation dryness and lubricant distribution.
4. Picking
- What it looks like: A localized form of sticking in which small portions of the tablet surface are pulled out by the punch face—most commonly inside embossed letters, numbers, or logos (such as closed loops in “A”, “B”, “O”, or “R”).
- When it occurs: During punch withdrawal immediately after main compression.
- Possible causes: Sharp or narrow embossing islands, overly deep debossing, worn or scratched punch engravings, tacky or overly moist granules, or insufficient compaction force in the center of a deeply concave tablet face.
- What to investigate: Inspect embossed punch tips under magnification, evaluate granule moisture and stickiness, and check compaction uniformity across the tablet face.
- How to prevent or reduce: Optimize embossing font geometry (wider strokes, appropriate draft angles), maintain clean and undamaged punch tips, and control moisture and room humidity.
5. Chipping
- What it looks like: Small pieces break away from the tablet edges, leaving ragged or missing rims.
- When it occurs: During ejection from the die, impact against the take-off blade or discharge chute, dedusting, bulk transfer, or coating pan tumbling.
- Possible causes: Overly dry or brittle granules, worn or nicked punch tip edges (land wear), misaligned take-off blade, excessive drop height into collection bins, or insufficient tablet mechanical strength.
- What to investigate: Inspect punch tip lands and edges, check take-off blade clearance and discharge chute geometry, and review friability and granule moisture.
- How to prevent or reduce: Maintain punch tip lands within specification, minimize mechanical drop impact during tablet transfer, and verify that tablet hardness and friability meet product targets.
6. Cracking
- What it looks like: Fine surface fissures or deep splits—typically across the center of the top or bottom face, or along the tablet band—without immediate full separation into layers.
- When it occurs: Immediately after ejection or over time as the tablet relaxes after compression (or later during coating if the core expands differently from the film).
- Possible causes: Rapid elastic expansion upon unloading, excessive compression force, overly dry or large granules, deeply concave punch geometry creating uneven density, or cold/brittle compression conditions.
- What to investigate: Review main compression force, punch cup concavity, granule size distribution and moisture, and post-ejection handling.
- How to prevent or reduce: Balance compaction force to avoid over-compression, evaluate shallower cup profiles if compatible with product design, and ensure consistent granulation moisture.
7. Binding
- What it looks like: A process-related defect in which the tablet resists ejection from the die bore, producing scored or rough tablet sides, chipped edges, elevated ejection force, squeaking or chattering noises, and potential press overload shutdowns.
- When it occurs: During the ejection stage as the lower punch pushes the tablet upward through the die.
- Possible causes: Insufficient or poorly distributed lubricant, abrasive formulations, worn or scored die bores (wear rings), excessive radial die-wall pressure from over-compression, or material buildup between the punch tip and die wall.
- What to investigate: Measure or monitor ejection behavior, inspect die bores for wear rings or scoring, verify punch-to-die clearance, and review lubricant level and mixing uniformity.
- How to prevent or reduce: Replace worn dies promptly, verify proper lubrication in the formulation, avoid excessive main compression force, and maintain clean tooling.
8. Double Impression
- What it looks like: A ghosted, blurred, or duplicated image of an embossed logo, score line, or lettering on one or both tablet faces.
- When it occurs: During compression or ejection when an embossed punch rotates slightly between pre-compression, main compression, or rebound contact.
- Possible causes: Free rotation of punches in non-keyed turret guides, worn punch keys or turret keyways, or punch bounce after main compression.
- What to investigate: Check whether upper and lower punches are properly keyed for embossed or shaped tooling, inspect keyways for wear, and review anti-turning mechanisms and cam tracks.
- How to prevent or reduce: Use properly keyed tooling for embossed or non-round tablets and inspect turret keyways during scheduled preventive maintenance.
9. Tablet Weight Variation
- What it looks like: A quality variation (not always visible externally) in which individual tablet weights fluctuate outside the product’s acceptable tolerance range.
- When it occurs: Continuously or intermittently throughout a batch, especially during speed changes, hopper level drops, or startup and tail-off.
- Possible causes: Poor powder flowability, wide particle size distribution or segregation in the hopper, inconsistent die filling at high turret speed, worn or uneven lower punch lengths, sticky lower punches that do not drop cleanly on the pull-down cam, or improper feeder paddle speed.
- What to investigate: Check lower punch working-length consistency, inspect lower punch movement in the guides, verify feeder speed and hopper level, and evaluate blend flowability and bulk density.
- How to prevent or reduce: Maintain matched punch lengths, ensure uniform granule flow and narrow particle size distribution, and align turret speed with the feeding system’s filling capability.
10. Hardness or Friability Problems
- What it looks like: Quality test indicators rather than purely visual defects. Tablets may fail breaking-force testing (too soft or too hard) or shed excessive dust and edge mass during friability testing.
- When it occurs: Detected during in-process quality checks or downstream handling, dedusting, coating, and blister packaging.
- Possible causes: Inadequate binder or poor compressibility, over-lubrication, inconsistent die fill (which changes compression force at fixed punch gap), overly fast turret speed reducing dwell time, or excessive compression force causing internal micro-cracks that paradoxically raise friability.
- What to investigate: Cross-check tablet weight, thickness, breaking force, and friability together; verify compression force stability, dwell time, and blend properties.
- How to prevent or reduce: Balance compaction pressure and dwell time against target disintegration and friability requirements, and monitor in-process trends rather than relying on a single test point.
What Causes Tablet Defects?
In practice, causes of tablet defects fall into four interacting categories. A single symptom—such as capping or sticking—can stem from more than one category, so engineers should treat these factors as potential contributors to verify rather than automatic one-to-one causes.
A. Material and Formulation Factors
Powder and granule behavior sets the physical limits of what a tablet press can achieve:
- Flowability and particle size distribution: Poor flow or excessive fines can lead to incomplete die filling, trapped air, weight variation, and capping. Segregation between coarse and fine fractions can cause batch drift.
- Moisture content: Too little moisture reduces plasticity and can make tablets brittle, promoting capping, cracking, or chipping. Too much moisture increases surface tackiness and capillary adhesion, contributing to sticking and picking.
- Compressibility and elastic recovery: Formulations that deform elastically rather than plastically tend to spring back after main compression, increasing the risk of capping and lamination.
- Lubrication and blend uniformity: Too little lubricant increases die-wall friction and binding; excessive lubricant or over-blending can coat particles with a hydrophobic film that weakens tablet bonding and reduces hardness.
B. Tablet Press Operating Conditions
Machine parameters determine how stress and time are applied to the powder bed:
- Die filling and feeder speed: If turret speed outpaces the powder’s ability to fill the die cavity, fill weight becomes erratic. Conversely, overly aggressive forced feeding can over-work shear-sensitive lubricants.
- Pre-compression and main compression force: Insufficient compaction yields soft, friable tablets, while excessive main force can over-compress the compact, trap air, and trigger capping or high ejection friction.
- Turret speed and dwell time: Higher turret speeds shorten dwell time—the duration punches remain at peak compression—which can weaken strain-rate-sensitive formulations and expose capping during scale-up.
- Ejection and take-off: Elevated ejection stress, misaligned take-off blades, or rough discharge chutes can chip or crack otherwise intact tablets.
C. Punches and Dies
Tooling directly shapes the tablet and transfers compaction forces:
- Wear and dimensional drift: Uneven punch working lengths cause weight and thickness variation across stations; wear rings inside die bores trap the tablet band and promote binding or capping.
- Surface condition: Scratched, pitted, corroded, or contaminated punch cups increase adhesion, leading to sticking and picking.
- Geometry and setup: Deeply concave cups, sharp embossing edges, worn tip lands (J-hooks), or loose/worn keyways can cause chipping, picking, cracking, or double impression.
D. Production Environment
Ambient conditions inside the compression suite directly affect hygroscopic and temperature-sensitive blends:
- Temperature and relative humidity: High humidity introduces surface moisture that worsens sticking, picking, and poor powder flow. Excessively dry air can increase electrostatic charging in some blends. Elevated room or turret temperatures can soften low-melting-point ingredients.
- Dust management: Poor dust extraction allows fine powder to accumulate on cams, punch guides, and die tables, accelerating wear, causing tight punch movement, and contaminating tablet surfaces.
Tablet Defects and Remedies — Troubleshooting Table
The table below summarizes common tablet defects and remedies as a structured diagnostic reference. Every corrective action should be evaluated against your specific formulation, press model, tooling design, and approved operating procedures before implementation.
On a mobile screen, swipe left or right to view the full troubleshooting table.
| Defect | Typical Symptoms | Possible Causes | Recommended Checks | Potential Corrective Actions |
|---|---|---|---|---|
| Capping | Top or bottom crown separates horizontally from the tablet body | Trapped air; high elastic recovery; excessive main force; short dwell time; excess fines or low moisture; worn die bores or punch tip J-hooks | Inspect die bores and punch tips; review pre-compression and main force logs; check turret speed; test granule moisture and fines | Evaluate pre-compression setup for de-aeration; test lower main force or slower turret speed within validated range; replace worn tooling or evaluate tapered dies; review formulation moisture/binder |
| Lamination | Tablet splits into two or more horizontal layers | Entrapped air; rapid elastic decompression; high turret speed; over-lubrication; worn die bores | Check pre-compression and speed settings; inspect die bores; review lubricant level and blending time | Adjust pre-compression and dwell time within approved limits; inspect and replace worn dies; review lubricant concentration or blending duration with formulation team |
| Sticking | Material adheres to punch faces or die walls; dull or pitted tablet surface | High granule moisture; elevated room humidity or temperature; low-melting-point ingredients; insufficient lubrication; rough or dirty punch faces | Inspect punch cup finish and cleanliness; check room temperature and RH; verify granule moisture and lubricant level | Clean and polish punch faces per tooling SOP; stabilize compression-room climate; evaluate anti-stick tooling finish or coating; review moisture and lubrication |
| Picking | Small areas pulled from tablet surface, especially inside logos or letters | Sharp or narrow embossing; damaged punch engravings; tacky or moist granules; low compaction in deep concave center | Inspect embossed tips under magnification; check granule moisture; verify compaction uniformity | Clean/refurbish or replace damaged punches; optimize embossing design on future tooling; control moisture and room humidity |
| Chipping | Broken or ragged tablet edges | Brittle or overly dry granules; nicked punch tip lands; misaligned take-off blade; harsh drop into bins | Inspect punch tip edges and lands; check take-off blade clearance and chute height; review friability data | Restore or replace worn punches; adjust take-off blade alignment and cushion tablet discharge; review granule moisture and hardness |
| Cracking | Fine surface fissures or deep splits on faces or band | Rapid elastic expansion; excessive compression force; overly dry/large granules; deeply concave punch geometry | Review main compression force; inspect punch cup profile; check granule size and moisture | Reduce excess compression force within validated window; review granule moisture/particle size; evaluate shallower cup geometry where feasible |
| Binding | High ejection resistance; scored tablet sides; press noise or overload | Insufficient lubrication; abrasive blend; scored or worn die bores; excessive compression force; powder buildup | Inspect die bores for wear rings/scoring; check punch-to-die clearance; review lubricant uniformity and force logs | Replace worn dies and clean tooling; verify lubricant distribution; evaluate lower main compression force if over-compressed |
| Weight Variation | Tablet weights drift outside acceptable tolerance | Poor powder flow; hopper segregation; turret speed exceeding fill capability; uneven lower punch lengths; tight lower punches | Measure lower punch working lengths; check punch guide movement; inspect feeder setup and hopper level; assess blend flow | Match punch working lengths; clean tight guides; align turret and feeder speeds within validated limits; improve granule flow and prevent segregation |
Step-by-Step Tablet Press Troubleshooting
When tablet compression defects appear during production, avoid making multiple simultaneous adjustments. A structured tablet press troubleshooting workflow helps isolate the root cause while preserving product quality and regulatory compliance:
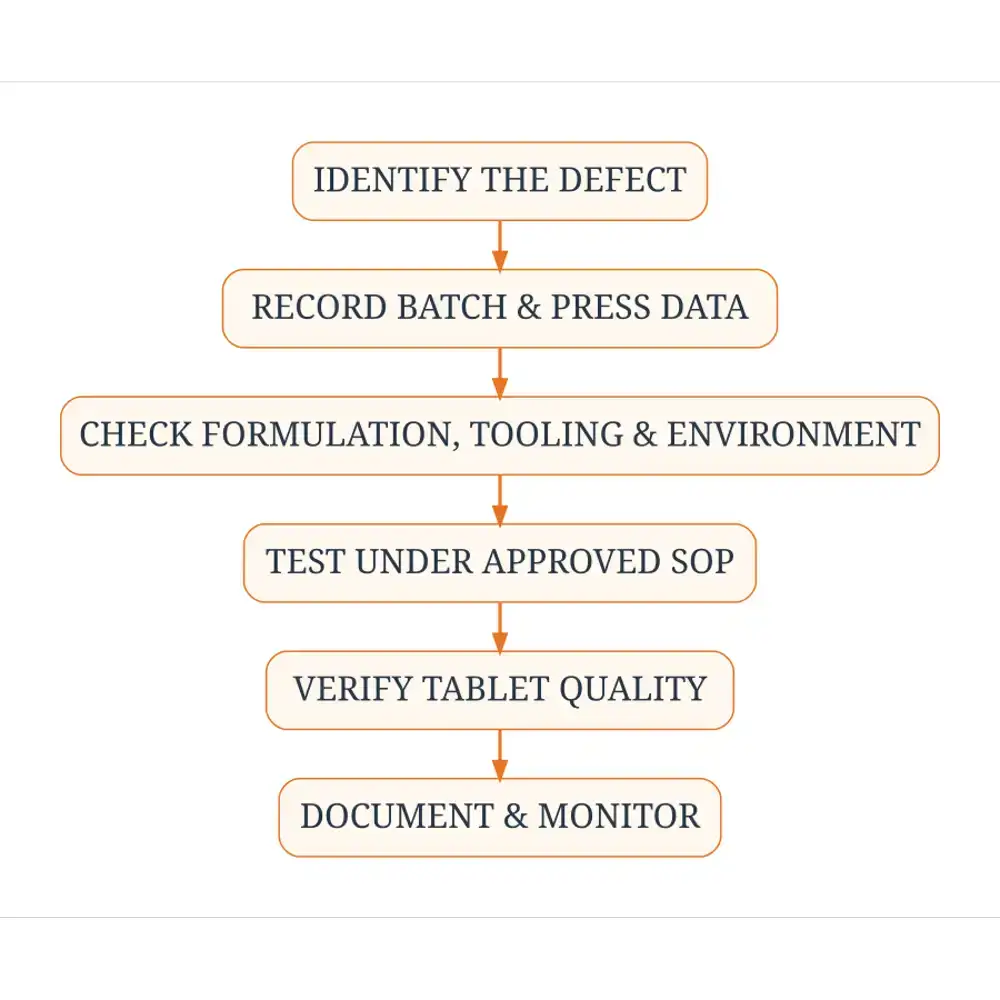
- Identify the defect and affected batch: Visually inspect samples across multiple turret stations and determine whether the issue affects the entire batch, specific stations, or a particular time window.
- Record operating conditions and quality observations: Log turret speed, feeder speed, pre-compression and main compression readings, room temperature and relative humidity, hopper fill level, and in-process weight, thickness, and hardness data.
- Assess formulation and material characteristics: Review batch records for raw material lot changes, granulation moisture, particle size distribution, bulk density, or lubricant blending variations.
- Inspect punches, dies, and feeding components: Safely stop and lock out the press per site procedures to inspect punch tips, lands, embossing, die bores, scraper blades, feed frame paddles, and take-off blades for wear, buildup, or misalignment.
- Review relevant machine settings: Compare active press setpoints against the approved master batch record or validated operating range to detect unintentional drift.
- Evaluate possible corrective actions under approved procedures: Test one controlled adjustment at a time—strictly within your site’s SOPs, equipment safety rules, and validated process boundaries. Unauthorized personnel must never alter validated process parameters outside formal change-control or deviation procedures.
- Verify results through appropriate quality checks: After any approved adjustment or tooling replacement, run a controlled verification sample and confirm visual quality alongside weight, thickness, breaking force, and friability as required.
- Document findings and preventive actions: Record the root cause, corrective action, and batch disposition in the quality management system so recurring trends (such as gradual tooling wear) can be prevented in future campaigns.
How to Prevent Tablet Defects
Preventing common tablet defects is more cost-effective than troubleshooting rejected batches. Because every formulation and press platform behaves differently, preventive controls should be tailored to your actual product and equipment:
- Raw material assessment: Verify incoming excipient and active ingredient specifications—including particle size, moisture, and bulk density—before blending.
- Blend and granulation consistency: Control granulation endpoints, drying uniformity, screening, and lubricant mixing time so the press receives a consistent, free-flowing feed.
- Tooling condition monitoring: Track punch working lengths, tip wear, and die bore condition across campaigns rather than waiting for visible defects to appear.
- Suitable press setup: Match press capacity, feeding method (gravity vs. forced feeding), and pre-compression capability to your product’s volume and compaction behavior. If you are scaling up from lab trials to commercial batches, understanding the mechanical differences between a single punch vs. rotary tablet press helps prevent scale-up surprises.
- Preventive maintenance: Follow the equipment manufacturer’s scheduled maintenance plan for cams, pressure rollers, punch guides, seals, and dust extraction systems.
- In-process quality checks: Plot weight, thickness, and breaking force trends throughout the run to catch gradual drift early.
- Operator training and documentation: Train operators to recognize early warning signs—such as subtle punch filming, rising ejection noise, or weight drift—and to escalate deviations promptly under site SOPs.
Tablet Press Tooling and Maintenance
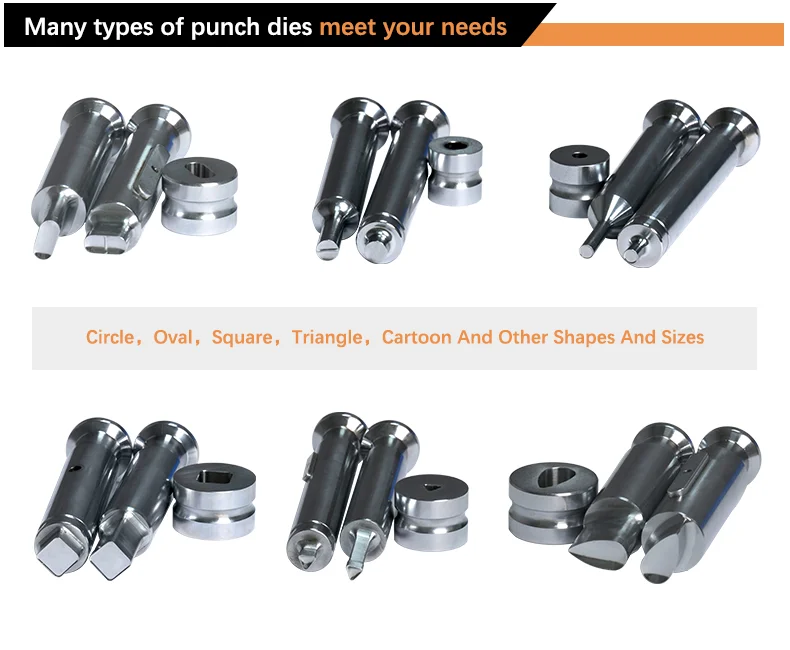
Punches and dies are precision wear components. Even a well-calibrated tablet press will produce defective tablets if tooling is nicked, corroded, unevenly worn, or improperly cleaned.
According to Natoli Engineering’s tooling maintenance guidance, structured tooling care rests on four core practices:
- Controlled handling and storage: Poor handling before or after a run is a leading source of punch tip damage. Using dedicated tooling racks and transport baskets prevents punch tips from colliding and forming burrs or edge nicks.
- Thorough cleaning and drying: Automated ultrasonic cleaning followed by warm-air drying removes residual powder from punch cups, key slots, and die bores without leaving trapped moisture that causes corrosion. On the press itself, vacuuming dust rather than using compressed air avoids blowing powder into bearings and crevices.
- Routine dimensional and visual inspection: Optical comparators help detect punch tip wear and lower-punch relief wear; digital indicators on a granite base verify punch working length and cup depth; and split-ball bore gauges identify wear rings inside die bores before binding or capping develops.
- Qualified refurbishment and replacement: Minor surface wear or punch-cup polishing should only be performed by trained technicians using appropriate equipment, and tooling that falls outside dimensional tolerances should be retired.
Always follow the specific disassembly, cleaning, and lubrication instructions provided in your tablet press OEM manual and site maintenance SOPs.
Tablet Quality Control During Production
Visual inspection catches surface flaws, but reliable tablet manufacturing depends on routine in-process and finished-product testing aligned with your product specification and applicable pharmacopeial or regulatory standards:
- Tablet weight variation: Confirms consistent die filling and metering across stations and throughout the batch.
- Tablet thickness: Monitors punch-to-punch consistency, fill uniformity, and downstream packaging compatibility (such as blister cavities).
- Breaking force (hardness): Measures the diametral load required to fracture a tablet (commonly referenced under USP <1217> or Ph. Eur. 2.9.8), indicating whether the compact can withstand handling without becoming too hard to disintegrate properly.
- Friability: Evaluates surface durability and resistance to abrasion or chipping under tumbling stress (commonly referenced under USP <1216>), which is especially critical before film coating or bulk packaging.
- Disintegration: Verifies that tablets break apart within the required time window in a defined liquid medium (such as USP <701>), ensuring compression force has not overly delayed release.
- Content uniformity (where applicable): Confirms that the active ingredient is evenly distributed across individual dosage units (such as USP <905>).
Important distinction: Consistent tablet weight does not automatically guarantee uniform active ingredient content. If powder segregation occurs in the hopper or blend uniformity is poor, tablets can meet weight specifications while still failing content uniformity. Likewise, test methods, sampling frequencies, and acceptance limits vary by product type (pharmaceutical vs. nutraceutical, immediate-release vs. chewable or effervescent) and must always follow the approved product specification.
Frequently Asked Questions
1. What are the most common tablet defects?
The most common tablet compression defects include capping, lamination, sticking, picking, chipping, cracking, binding, and double impression, along with measurable quality variations such as weight variation, out-of-spec breaking force (hardness), and excessive friability.
2. What causes tablet capping during compression?
Tablet capping is commonly linked to trapped air in the powder bed, high elastic recovery of the formulation after compression, excessive main compression force, short dwell time at high turret speeds, excessive fines or overly dry granules, and worn die bores or punch tip edges.
3. What is the difference between capping and lamination?
Capping is the horizontal separation of the top or bottom crown of a tablet from its main body. Lamination is the splitting of the tablet into two or more distinct horizontal layers. Both share similar root causes involving trapped air and elastic stress, but lamination affects the internal body of the tablet rather than just the cap.
4. Why do tablets stick to punches?
Tablets stick to punches when adhesion between the formulation and the punch face exceeds the cohesive strength inside the tablet. Common contributors include high granule moisture, elevated room humidity or temperature, low-melting-point ingredients, insufficient lubrication, and rough, worn, or dirty punch faces.
5. Can compression force cause tablet defects?
Yes. Insufficient compression force can produce soft, friable tablets prone to chipping and sticking. Conversely, excessive compression force can trap air, increase radial die-wall friction, and induce internal stress—leading to capping, lamination, cracking, binding, or delayed disintegration.
6. How can manufacturers reduce tablet weight variation?
Manufacturers can reduce weight variation by improving blend flowability and minimizing particle segregation, matching lower punch working lengths, ensuring smooth punch movement in the guides, maintaining consistent hopper levels, and aligning turret speed with the press’s feeding capability.
7. Can a tablet press eliminate all tablet defects?
No. A well-engineered tablet press with features such as pre-compression, forced feeding, and stable speed control can significantly improve consistency, but it cannot override fundamental formulation issues such as poor compressibility, inadequate lubrication, excessive moisture, or severe powder segregation.
8. How often should tablet press tooling be inspected?
Tooling should be visually inspected before and after every production run for cleanliness, tip nicks, embossing damage, and surface wear, with periodic dimensional checks (working length, cup depth, and die bore wear) scheduled based on batch volume, formulation abrasiveness, and site quality procedures.
Conclusion
Tablet defects rarely trace back to a single isolated variable. Whether a line is dealing with capping, sticking, binding, or weight variation, lasting resolution requires evidence-based troubleshooting that evaluates material properties, punch and die condition, press operating parameters, and room environment together.
Selecting equipment matched to your formulation and production volume—and supporting it with disciplined tooling inspection and preventive maintenance—provides a stable foundation for consistent tablet quality. To explore press configurations suited to your batch size and tablet geometry, review GRAND Machinery’s rotary tablet press range or contact our engineering team to discuss your specific production requirements.
References
- Natoli Engineering — Robert Sedlock, Preventing Capping and other Tablet Defects (natoli.com/preventing-tablet-capping/)
- Natoli Engineering — The Proper Way to Maintain Your Tablet Presses and Tooling, originally published in Tablets & Capsules Solid Dose Digest, Nov 2019 (natoli.com/tablet-press-tooling-maintenance/)
- I Holland / Tableting Technology — How to Avoid Sticky Situations, technical whitepaper on sticking, surface roughness, and environmental factors (tabletingtechnology.com)
- United States Pharmacopeia (USP) General Chapters: USP <1216> (Tablet Friability), USP <1217> (Tablet Breaking Force), USP <701> (Disintegration), and USP <905> (Uniformity of Dosage Units)